2.2" ILI9340C TFT and the Raspberry Pi
Introduction
This page describes how I went about connecting a small 2.2” TFT display to the Raspberry Pi. This page is mainly for reference about what chip is in the display and what modules are required to make it work.
The hardware
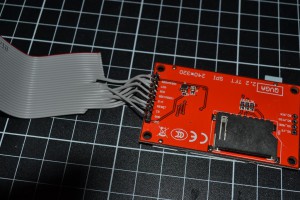
The display is I purchases is a 2.2” Colour TFT with a resolution of 320x240. It is controlled with the ILI9340C LCD driver chip via the SPI bus and runs on 3.3v. They can be found on eBay for a ~$6 AUD.
This was then connected to the Raspberry using the GPIO header by making up a short adapter cable between the two. The pinouts I used are as follows:
LCD PinRPI PinRPI Pin #
| BL_LED | GPIO_18 | 12 |
| SCK | SCLK | 23 |
| MISO | MISO | 21 |
| MOSI | MOSI | 19 |
| CS | CE0 | 24 |
| RST | GPIO 25 | 22 |
| D/C | GPIO 24 | 18 |
| Vin | 3.3V | 17 |
| GND | GND | 20 |
Giving a cable that looks something like this:
The Software
There’s an excellent driver written by Notro and called FBTFT and can be downloaded from his repository here: https://github.com/notro/fbtft
Setup
Here’s how I setup mine. I can’t really take any credit for this, I just followed the instructions provided by Notro and choose the right module.
Check the spi line is commented out
sudo nano /etc/modprobe.d/raspi-blacklist.conf
Install a the new kernel modules
sudo REPO_URI=https://github.com/notro/rpi-firmware rpi-update
sudo shutdown -r now
Load the modules, which in our case is adafruit22a
sudo modprobe fbtft_device name=adafruit22a
I then made it permanent by adding the following to /etc/modules
fbtft_device name=adafruit22a verbose=0
and the following to /boot/cmdline.txt
fbcon=map:10 fbcon=font:VGA8x8 fbcon=rotate:1
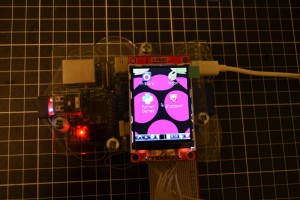
Then you should get something that looks like this: